Difficulty: 4/10
Est Time: 10 hours
Est Material Cost: $80
Tools:
- Drill Driver Combo
- Rubber Mallet
-
Table Saw
- Alternatively, circular saw with a Track
-
Miter Saw
- Alternatively, Circular Saw
- Bench Thickness Planer (optional)
- Palm Sander (optional)
- glubot (optional)
Material List:
- 2x8x8 Pine X 6
Consumables:
- 1/4" Dowels
- 1/4" Countersink Drill Bit
- 1/4" x 4" Drill Bit
- 3" Deck Screws
- Wood Glue
- Wood Stain
- Torx Bits
- Sand Paper
1. Dimensioning your lumber
This is a very flexible design, so the exact dimensions of the pieces really depend on your preference. The primary goal is that the support pieces are tall enough to fit what your are attempting to store on the shelves; Meaning, whatever your tallest book is try to make the supports somewhat longer than that. Also, the supports should be recessed from the shelves, so the supports should be thinner than the shelves. How recessed the supports are is entirely up to you. Additionally, how many supports you have can be adjusted as well as the length of the shelves.
My dimensions:
- shelf length: 48"
- shelf width: 7 3/4"
- shelf thickness: 2 5/8"
- support length (height): 15"
- support width: 6 1/2"
- support thickness: 2 5/8"
We are working with 2x8x8's, so the first step is to cut everything down to length. Start by cutting enough 2x8's in half to accomodate the number of shelves you want. I wanted 5 shelves at ~48" (the blade is ~1/8, so the final length of the shelves are approximately 47 15/16). This means 3 2x8's will cover the shelves for me.
Next, we need the supports. Each shelf needs 3 supports at ~15". Each 2x8 is 96" long, which means we can expect 6 supports from each board. This puts us around 3 more boards.
Once each of the boards are cut to length, I use the table saw to rip down the edges to a consistent size. Look for the thinnest width for your shelving boards and use that board to set the fence on the table saw. Trim off just enough to get a full cut from that board, then run the remaining shelves through the saw. Once you've run them all through, flip them over and set the fence to 7 3/4" and run them through again. This should give you consistent widths and lengths for your shelves. Do the same thing for the supports, but finish the width at 6 1/2".
The only remaining incongruency is the thickness of the wood. I happen to have a bench thickness planer, so I find the thinnest board and use that to gauge how thick to make the remaining boards. I run the boards through the planer, alternating each face until each board is the same thickness.
This is a really tedious step, but it makes the rest of the project go much more smoothly.
Prepping the Wood Surface
It's usually much better to prep and get a finish on the wood before doing any joinery/assembly. Once things are joined, its much more difficult to get to the things you need to and getting a smooth pass over a board is near impossible.
I start by sanding the wood to around 220 grit using a palm sander. Next, depening on the type of wood, you can apply a finish to it. Be sure to clean the surface of the wood with mineral spirits prior to staining or painting. Mineral spirits evaporate quickly and greatly reduce down time compared to water. Once the wood is dry, you can apply your preferred stain color to the wood. Wait for the stain to cure, and then apply a polyuerathane finish to protect the wood. Since this is a softer wood, this step will extend the life of the final product quite a bit.
Assembly
Drilling
Step 1
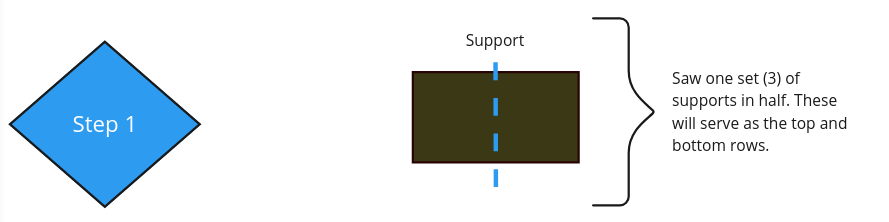
Start by taking one set of supports (3 for me) and cut them all in half; These pieces will serve as the top and bottom rows of the shelf. On these pieces drill two slots in each on the top side. On one set, drill a 3" slot into the bottom as well.
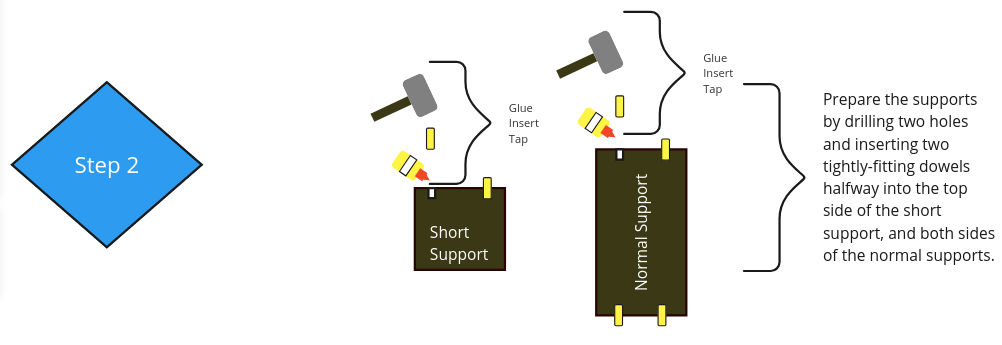
Step 2
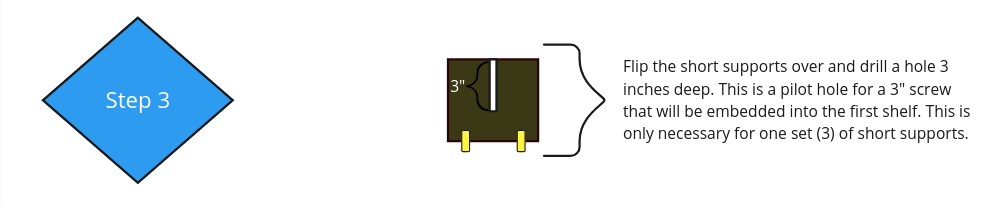
Step 3
On the remaining full-size supports, drill slots two slots for dowels on the top and bottom of each for a total of four dowels on each support. Once each of the slots are drilled, apply glue and insert a dowel into each of the dowel slots.
The First Shelf
The first shelf requires a slightly different technique than the remaining shelves.
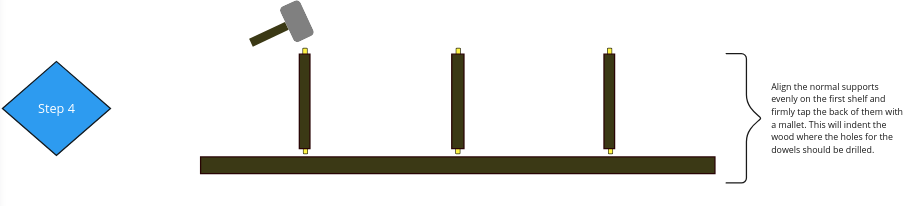
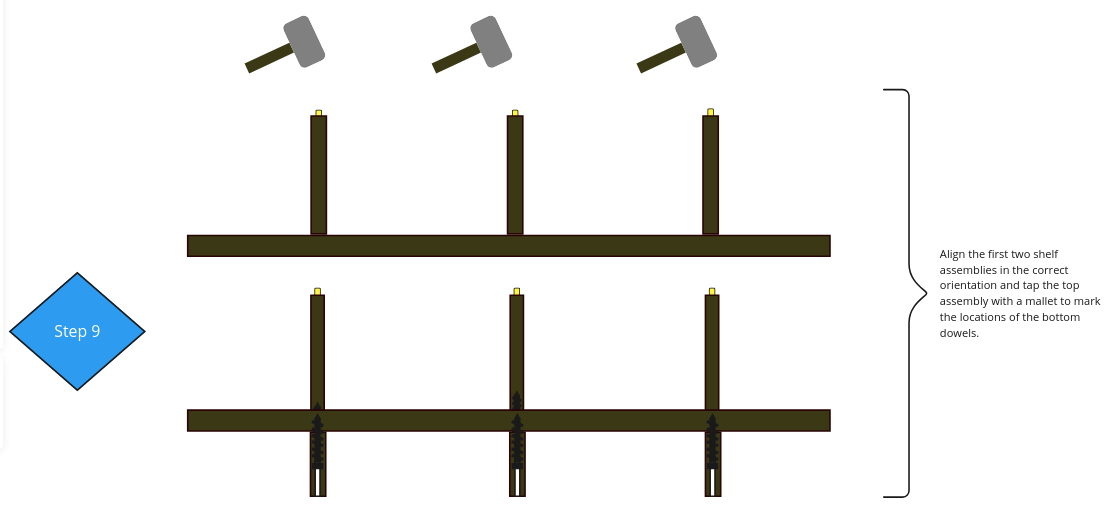
For this shelf, we start by aligning the full-size supports on top of the shelf. These supports are the ones between the first and second shelves. Once you have the spacing and alignment just right, firmly tap the top of the support with a mallet. The goal is to indent the shelf where the dowel slots should be drilled into the shelf. Once you have those indentations, drill the slot to receive the dowels of the supports.
Step 4
Glue the joint and connect the support to the shelf. Once the support is connected, using a countersink bit, drill the underside of the shelf opposite the support, and insert a 3" deck screw through the shelf into the support.
Step 5
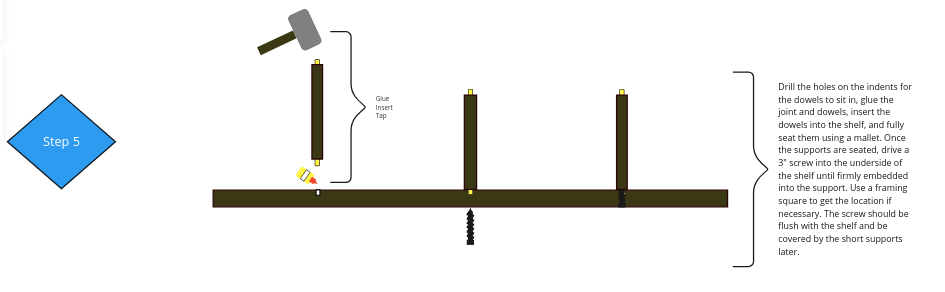
This should provide a robust and sturdy joint. Note the location of the 3" screw slot on the short support, and avoid this location on your underside fastener.
Once you are finished screwing the full-size supports, proceed to match the short supports that contain the screw slot with the full-size support on the underside of the shelf.
Step 6
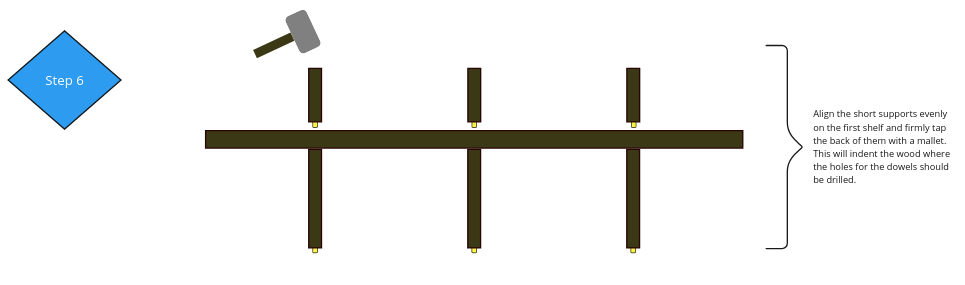
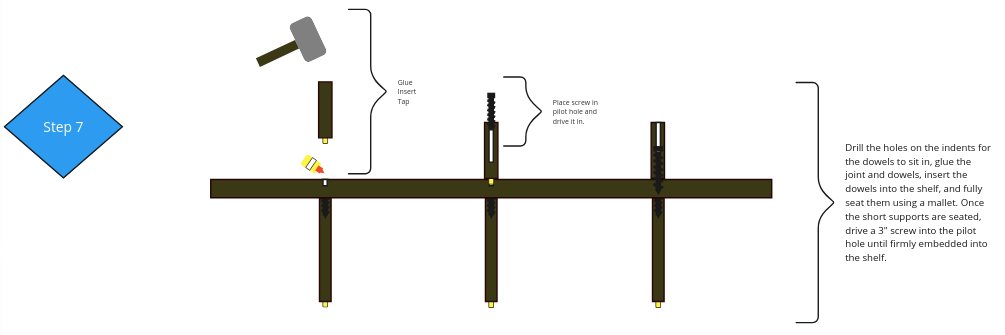
Once aligned, tap the top of the short support firmly and drill the indent to receive the dowel, glue the joint, connect the pieces, and drill a 3" deck screw into the 3" screw slot.
Step 7
The Following Shelves
To produce the following shelves, align supports to match the spacing you've set, tap the support to produce an indentation, drill the dowel slot, glue the joint, and countersink a screw into the underside to complete the joint.
Step 8

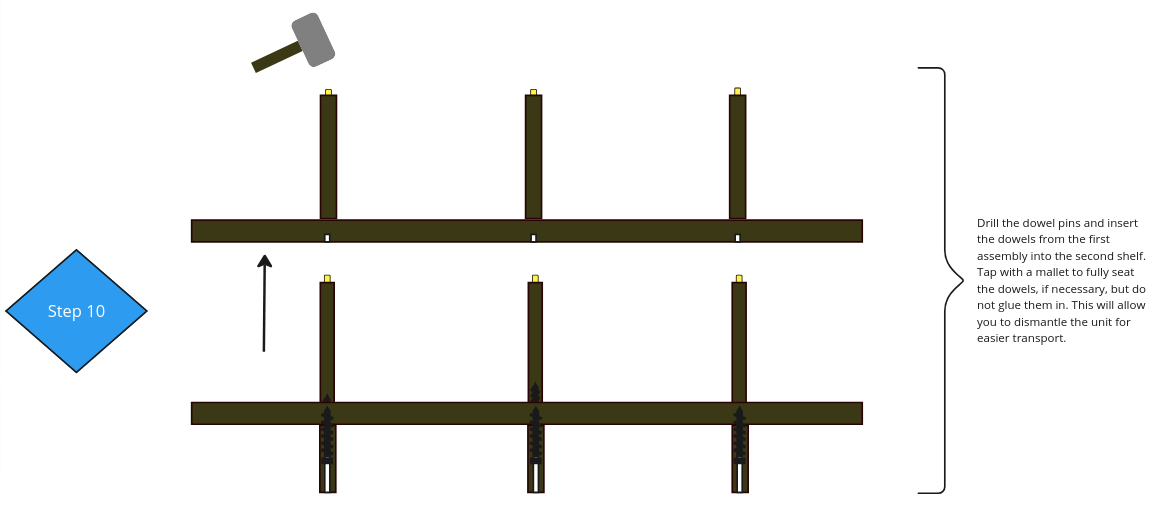
Once the shelf section is complete, align it over the previous section, tap it to indent the drill location, bore the hole for it, and connect the joint. Do not glue these joints as you would want to disconnect them at some point.
Step 9
Step 10
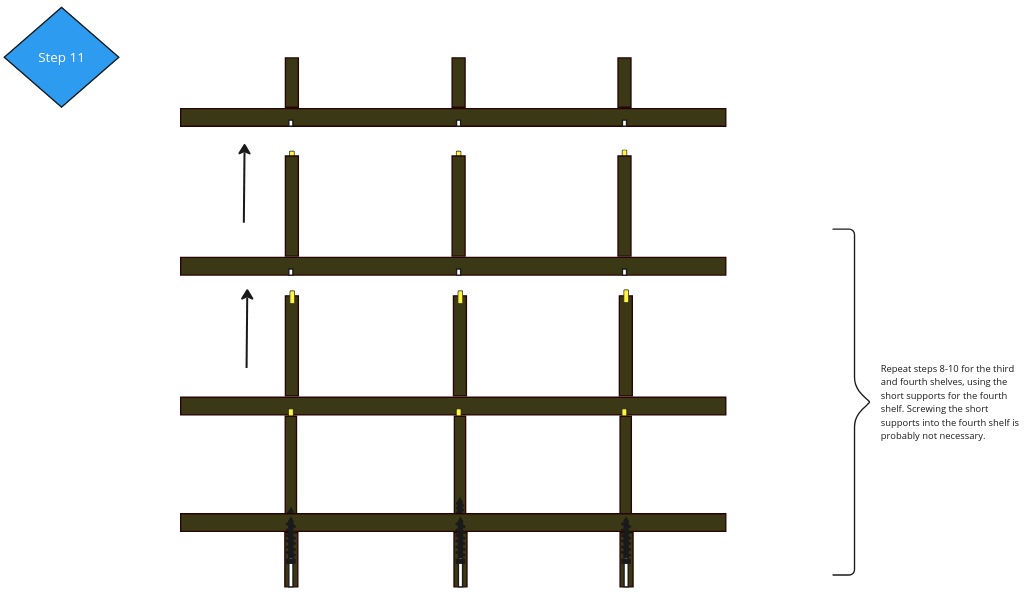
Continue this process until you have finished all sections and the shelf is assembled. You may take the shelf apart in sections, as this is solid wood it can be quite cumbersome to move.
Step 11
At the final location, be sure to mount the shelf to the wall for stability.